How to Remove the Camera Shutter on Your Lenovo Laptop
Introduction
Are you experiencing issues with the camera shutter on your Lenovo laptop, or do you have specific preferences for your device’s functionality and security? This guide will help you remove the camera shutter safely and effectively. We’ll discuss everything from the tools you need to the step-by-step process, ensuring your laptop’s camera works perfectly. We will also cover maintaining functionality post-removal and consider alternative privacy solutions.
Understanding Lenovo Camera Shutters
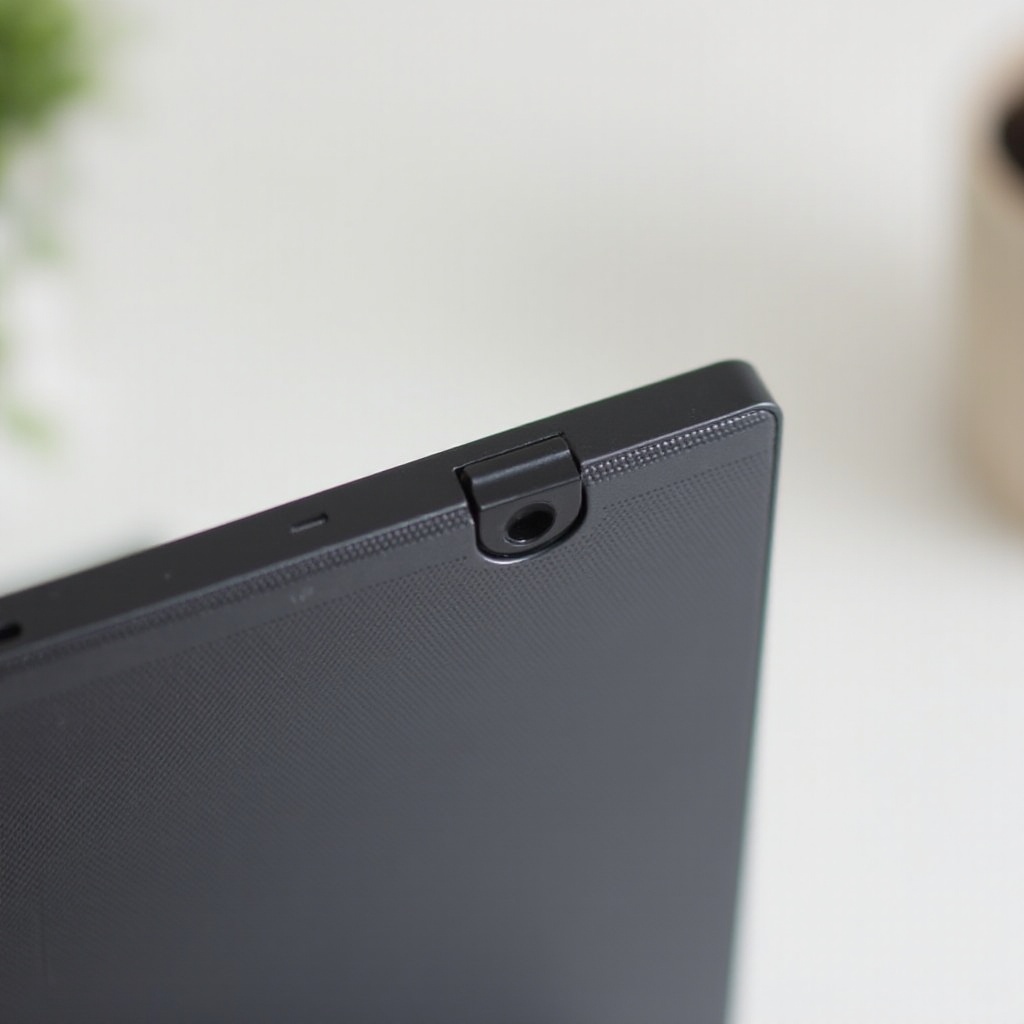
Lenovo laptops often come equipped with a physical camera shutter designed to enhance privacy. This small, sliding cover rests over the camera lens, ensuring you can block visuals when needed. However, some users might find this feature more hindrance than help. Despite its simplicity, removing this shutter requires careful handling.
The process involves understanding the camera’s construction and how the shutter integrates with it. Knowing these details helps in making a well-informed decision on its removal and ensures you perform the task correctly without damaging the camera or laptop.
Reasons to Remove the Camera Shutter
Addressing Malfunctions
A malfunctioning camera shutter can impede proper functioning. If the shutter is stuck or damaged, it can lead to a blocked or unclear camera view. Removing it eliminates this issue, restoring the camera’s functionality.
Improving Camera Functionality
For professional use, especially in fields requiring high-quality video calls or recordings, an unobstructed camera is essential. Removing the shutter can ensure a clear, uninterrupted view, enhancing the overall quality of your video output.
Personal Preferences and Security
Some users might prefer a cleaner, shutter-free design for aesthetic reasons. Additionally, software solutions can sometimes provide better control and security, making the physical shutter obsolete. Understanding these preferences allows for tailored decisions to your needs.
Tools You Need
Before starting the removal process, gather the necessary tools to ensure a smooth operation:
– A small Phillips head screwdriver
– A pair of tweezers or needle-nose pliers
– Microfiber cloth to clean the camera lens
– A static-free workspace
These basic tools ensure you’re prepared to handle the task without causing damage to the laptop.
Step-by-Step Guide to Removing the Camera Shutter
Preparation
- Power Down: Turn off your Lenovo laptop completely to avoid any electrical issues.
- Workspace: Ensure your workspace is clean and static-free to prevent dust from entering the camera area.
- Gather Tools: Have all necessary tools within reach to avoid any interruptions during the process.
Removal Process
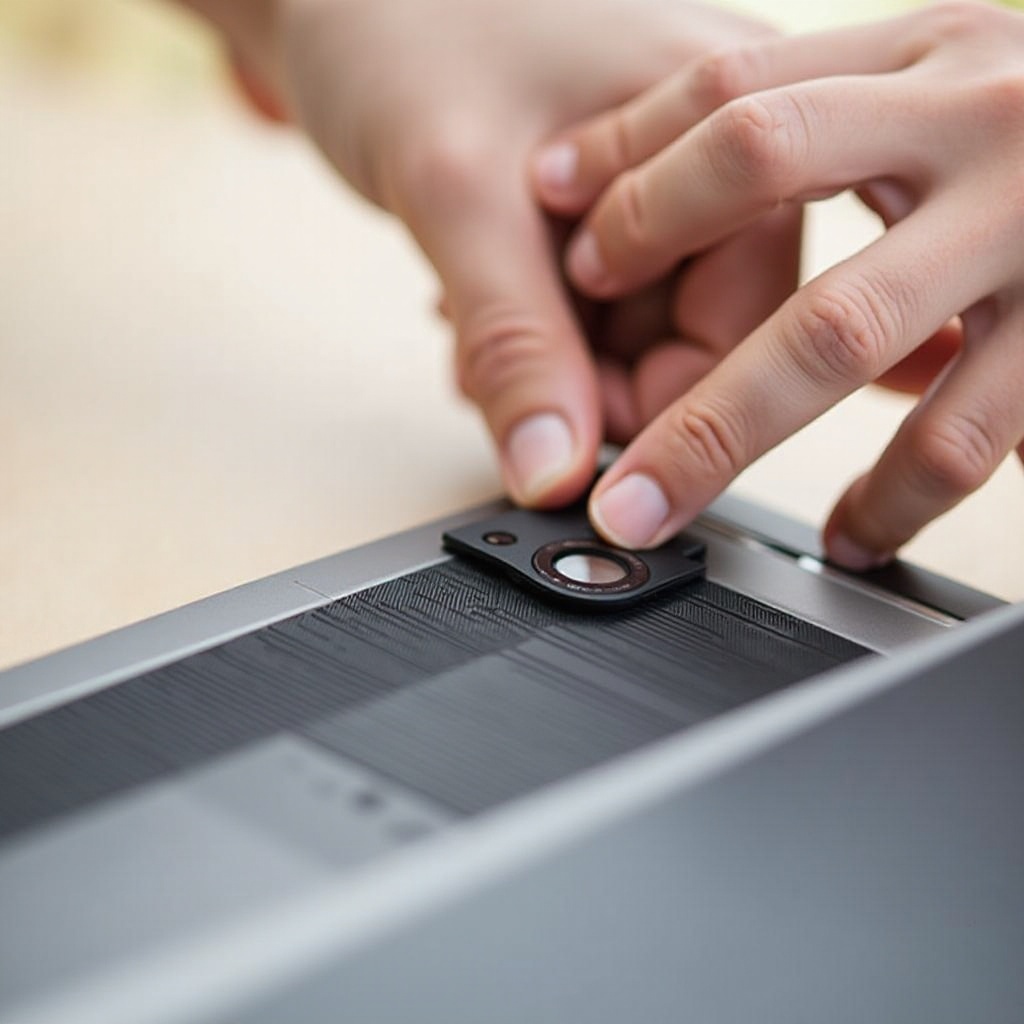
- Locate the Screws: On most Lenovo laptops, the camera and its components are secured by small screws around the camera module.
- Remove Screws: Using the Phillips head screwdriver, carefully unscrew and set the screws aside in a safe place.
- Detach the Bezel: Gently pry open the bezel around the screen to access the camera shutter. Use the tweezers if necessary for precision.
- Remove Shutter: Identify the shutter mechanism, which is typically a small, detachable cover. Carefully remove this component without applying excessive force.
- Clean Area: Use the microfiber cloth to clean the camera lens and surrounding areas. This ensures no residue or fingerprints blur the camera view.
Post-Removal Checks
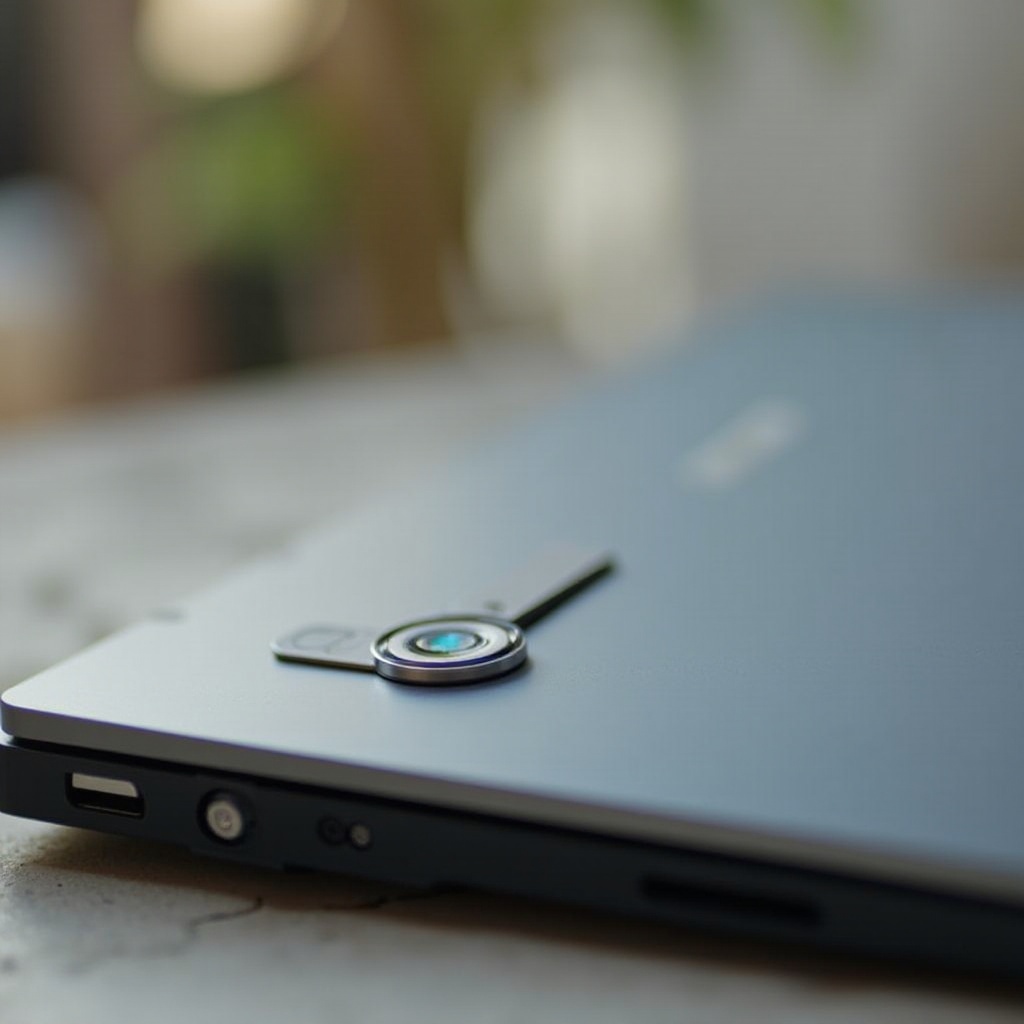
- Reassemble: Reattach the bezel and screw it back securely.
- Test Camera: Turn on the laptop and test the camera using the built-in camera application. Ensure the view is clear and unobstructed.
- Final Adjustments: If necessary, tweak the bezel or screws to ensure the camera module is stable and secure.
Maintaining Camera Functionality Post-Removal
Testing the Camera
Once the shutter is removed, regularly test the camera to ensure it operates correctly. Open video conferencing or webcam applications to verify the clarity and stability of the camera feed.
Adjusting Software Settings
Ensure your camera’s software settings are optimized. This may involve adjusting brightness, contrast, and other camera settings through the Lenovo Vantage app or the native camera software. Regular updates can also enhance performance and security.
Alternative Solutions for Camera Privacy
Using External Privacy Covers
If privacy remains a concern, consider external solutions such as adhesive privacy covers. These can be easily applied or removed without the need for internal modifications.
Software-Based Security Measures
Leverage software-based security features, such as integrated privacy settings in Windows or third-party applications that provide camera and microphone access control. These tools offer an additional layer of protection without physical modifications.
Conclusion
Removing the camera shutter on your Lenovo laptop can address various issues, from malfunctioning shutters to personal preferences, without compromising on functionality. By following our detailed guide, you can perform this task safely and ensure your camera works flawlessly post-removal. Whether you prefer hardware or software solutions for privacy, understanding your options allows you to make the best choice for your needs.
Frequently Asked Questions
Is it safe to remove the camera shutter from my Lenovo laptop?
Yes, if done carefully following the proper steps, removing the shutter is safe. Ensure you gather necessary tools and follow guidelines to avoid damage.
Will removing the camera shutter void my warranty?
Altering hardware components may void your warranty. Check Lenovo’s warranty terms and conditions or consult with their support team before proceeding.
What can I use as a replacement for a removed camera shutter?
Adhesive privacy covers are an excellent alternative, providing easy-to-use physical coverage without the need for internal modifications.